


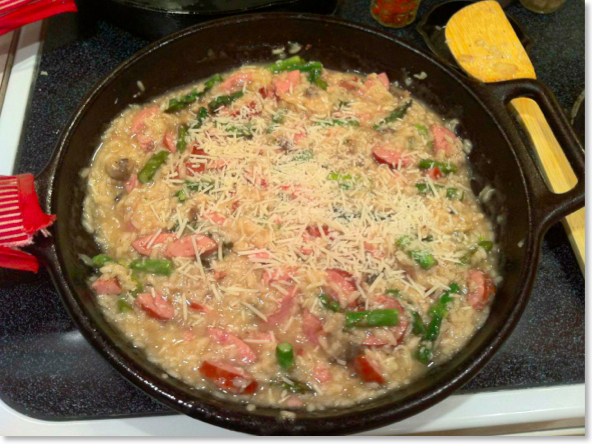
Sausage & Asparagus Risotto
My husband and I are fans of Gordon Ramsay’s “Hell’s Kitchen.” Truth be told, the drama and yelling attract me more than any food on the show, but I noticed that risotto was a staple in every single menu served on the show. I didn’t really know what risotto was, much less how to prepare it, so when I came across a sausage and asparagus risotto recipe in a Kroger circular I decided to try it. I’ve modified the recipe slightly and created a low sodium version (since my world now involves doctor-mandated low salt foods). Both versions ended up tasting wonderful, although I would encourage folks to try the “real” version first to get the full experience, especially if you have never tried risotto.
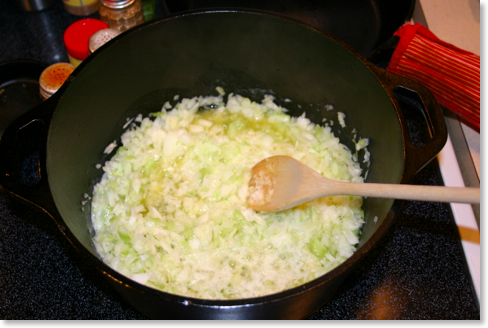
My big “a-ha” was that Arborio rice is made specifically for risotto recipes. Make certain to get this specialty rice so that the risotto turns out the way it should. A trick that seemed to work out well for me was to cook the asparagus in the same skillet that I had browned the sausage. This gave the asparagus a really good flavor, and I had trouble not snacking on the asparagus before it went into the risotto! The original recipe called for 1/2 cup of fresh mushrooms, but I doubled the amount the first time I made it and tripled it the second time, although you could certainly adjust the amount of any of the vegetables to suit your taste.
I used our Lodge 12-inch Pro-Logic skillet, which was the perfect size for the risotto. The sloping sides of this piece of cast iron made the stirring go smoothly—a bonus since the recipe calls for 20 minutes of constant stirring! I used a slanted wooden spatula (pictured), normally used for woks, although any wooden spoon would do.
I loved this recipe so much that I made it twice in three days! Rick definitely liked the regular version the best, but I must admit that the low sodium was more to my liking. Thanks to Gordon Ramsay and “Hell’s Kitchen,” I’m now “in-the-know” about risotto!
(low sodium options in red)
Cast Iron Required:
12” skillet
Ingredients
- 1 lb. smoked sausage (or half a pound of sausage)
- 4 cups chicken broth (4 tsp. sodium free chicken bouillon w/ 4 cups water)
- 1 Tbsp. olive oil
- 1 onion, chopped
- 1 1/2 cups mushrooms, sliced
- 2 Tbsp. butter (unsalted butter)
- 1 cup Arborio rice
- 1/2 cup dry white wine
- 2 cups sliced asparagus, cooked crisp-tender
- 1/2 cup shredded Parmesan cheese, divided (no cheese)
Cut sausage into ½ inch cubes; set aside. Bring broth to a boil in a saucepan. Reduce heat to low.
Heat oil in a 12-inch Pro-Lodgic skillet over medium-high heat. Add sausage, onion and mushrooms. Cook, stirring frequently, until sausage is browned.
Add butter and rice. Cook, stirring constantly, 2 minutes. Stir in wine; cook until liquid is almost completely absorbed.
Stir in ½ cup of heated chicken broth. Cook, stirring constantly until liquid is absorbed. Add remaining broth, ½ cup at a time, stirring constantly until each portion of broth is absorbed (about 20 minutes total).
Remove from heat; stir in asparagus and ½ of the Parmesan. Sprinkle top with remaining cheese.
Serves 6
Feel free to leave your thoughts in the comments below, or you can contact Kathy directly at kathy@cookingincastiron.com.
Dutch Oven Brisket

Cast Iron Required:
- 5 quart dutch oven (kitchen, not outdoor)
- cast iron trivet
Ingredients:
- 2-3 pound flat brisket
- 2 shallots, sliced thin
- 1 tsp. black pepper
- 1/2 tsp. salt
- 1 tsp. thyme
- 1 can cream of mushroom soup
- 8 oz. Sherry
A while back Rick posted information on the Cooking in Cast Iron website about converting cooking times and temperatures from slow cookers to cast iron dutch ovens. He encouraged me to try one of my brisket recipes to test out the conversion chart. Well, my brisket recipe is one of my prized cooking secrets. The recipe was handed down by my mom, and it produces the most tender brisket ever. The brisket cooks slowly (8 hours) in a low temperature oven (225) wrapped in foil. Mmmmm good. I wasn’t sure I was ready to alter those winning steps. So, I figured I would try my second best brisket recipe—this one from one of our slow cooker cookbooks.
I picked up a brisket at the grocery store last week and put it in the freezer, not knowing when I might try the oven version of this slow cooker success story. When Rick had to work late last night, I decided to try my experiment. I grabbed the slow cooker cookbook and quickly found the “Brisket in Ale” recipe I had used before. Unfortunately, I didn’t have some of the main ingredients. So, off to the pantry I went in search of substitutes. I was bound and determined to see if these conversion numbers were really accurate.

I must admit that I had my doubts about the brisket being even close to done after that short amount of time. So, when the timer went off, I didn’t event check under the lid. I left everything in for another 30 minutes just to be sure.

Feel free to leave your thoughts in the comments below, or you can contact Kathy directly at kathy@cookingincastiron.com.
Queenie's Peach Cobbler/Looking at the World through Cast Iron Lenses

That is, when you go to a restaurant or perhaps to dinner at a friend’s house, do you think when the food is served, “You know, I bet this would taste even better if it were cooked in cast iron”?
I admit I do this. In fact, when I make old family recipes, I chuck the directions to use a glass dish, and I usually cook in cast iron instead. You think that green bean casserole is good in a Pyrex dish? You’ve not had green bean casserole until you’ve had it cooked in cast iron. If skillet fries taste best in cast iron, think of how good your uncle’s hash brown casserole will taste. I’ve got two cast iron pans specifically for casseroles, but if you don’t, a cast iron skillet will work just as well.
My cast iron
Of course, I should point out that I never actually ate this peach cobbler at my grandmothers house when she was alive. But my mother made it regularly and always referred to it as her “Mom’s Peach Cobbler.” In the copy of the recipe I received, which had the title just mentioned at the top of the page, the directions simply called for a “casserole” dish. But this goes back to my previously mentioned point—I was certain this would go better in cast iron!
In fact, the recipe itself isn’t all that different from the cobblers we’ve made while camping, using a dutch oven placed directly on top of live coals. One of the best features of those great campout cobblers is the crust that forms in the cast iron. Therefore, I was fairly certain that I could (forgive me for saying this!) improve on my grandmother’s recipe.
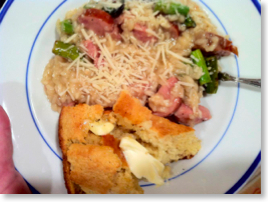
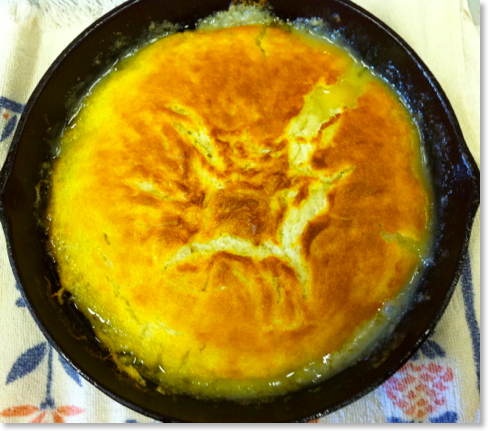
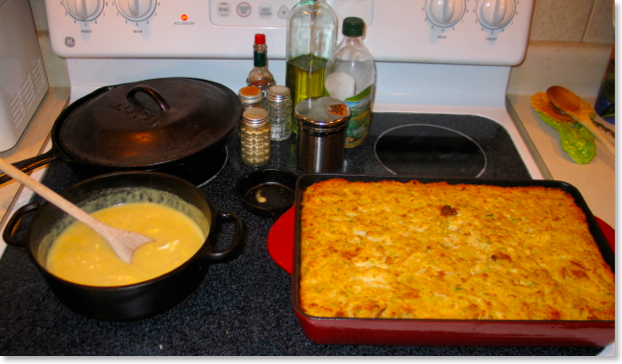
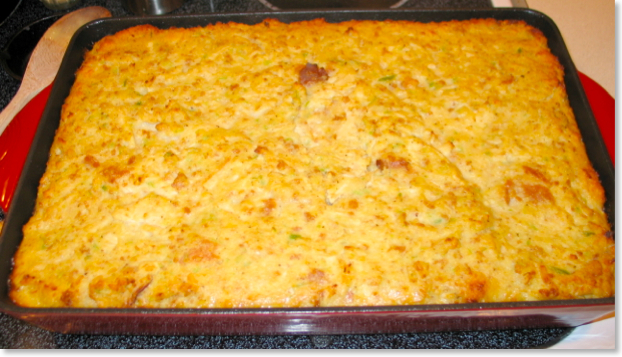
At our church, my Sunday school class has a potluck brunch every first Sunday of the month. So two weeks ago, I decided to make my grandmother’s peach cobbler, but not in a glass dish, but in cast iron! Now, my wife, Kathy, who doesn’t like peaches (odd, isn’t she?), asked if I’d also make one using apples instead. The recipe is pretty versatile, so the picture at the beginning of this post has apple on the left and peach on the right. To make the cobbler even more special, I made the original peach recipe specifically in my grandmother’s skillet that was handed down to me years ago. It is a BS&R and is at least 70 years old if not older. I used my Lodge skillet that I got in the nineties for the apple cobbler.
Needless to say, both cobblers were a hit, but the peach cobbler was completely gone when the apple cobbler was only half eaten. But by the end of our class, both pans were empty. Cast iron is definitely superior to the standard casserole dish for this recipe as you probably imagine. I encourage you to join me in looking at your world through cast iron lenses!
So, here is Queenie’s recipe for peach cobbler. It’s very easy, so very basic and so very good. Enjoy!
Queenie’s Peach Cobbler
10.25" Cast Iron Skillet
Ingredients:
- 1 stick butter
- 1 cup of sugar
- 1 cup of flour
- 1/4 teaspoon of salt
- 2 teaspoons of baking powder
- 1 cup whole milk
- 1 can of sliced peaches, don't drain
Melt a stick of butter in a cast iron skilet.
Mix a cup of sugar, a cup of flour, 1/4 teaspoon salt, two teaspoons of baking powder, 1 cup whole milk.
Pour in 10.25" cast iron skillet and add one large can of sliced peaches (don’t drain).
Bake at 350° 30-40 minutes.
Rick plans to post more of his grandmother’s recipes in the future, so check back often. Feel free to leave your thoughts or ask questions in the comments below, or you can contact Rick directly at rick@cookingincastiron.com.
Veggie Tales II
Posted by Kathy Mansfield
Vegetables? Yuck! That’s been my usual response when offered vegetables for any meal, unless they were potatoes or green beans. But, recently I’ve widened my pallet. Rick made a semi-New Year’s resolution to eat more vegetables, especially those he has never tried. Since I live here, too, that meant that I would end up having to try them, as well.
My in-laws were recently on an asparagus kick, so when we visited them earlier this year we were served this “new-to-us” vegetable several times. After we returned to Kentucky, Rick found a recipe for asparagus that we could prepare in cast iron. Although asparagus is not my favorite dish, this turn-her-nose-up-at-green-vegetables-girl has actually requested this particular asparagus recipe for dinner more than once.
PAN-GRILLED GLAZED ASPARAGUS
(adapted from "Mustard-and-Mayonnaise Glazed Asparagus" by Nate Appleman, Food & Wine, June, 2009)

Cast Iron Required:
10.25” cast iron grill pan
Ingredients
- 1/4 cup mayonnaise
- 1/4 cup coarse grain mustard
- 1/4 cup extra-virgin olive oil
- 3 tablespoons fresh lemon juice
- 1 teaspoon lemon zest, finely grated
- 1 garlic clove, crushed
- 2 teaspoons kosher salt
- 2 teaspoons freshly ground black pepper
- 1 lb. thick asparagus, trimmed
In a shallow dish, whisk the mayonnaise with the mustard, oil, lemon juice, lemon zest, garlic, salt and pepper. Add the asparagus and turn to coat. Let stand at room temperature for 30 minutes.
Heat a cast iron grill pan over a medium-high heat, turning occasionally, until the spears are tender and lightly blistered in spots—about 6 minutes. Serve the asparagus hot or at room temperature.
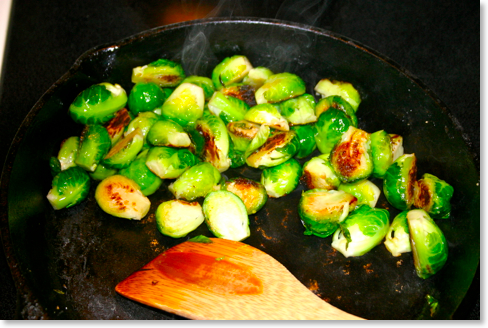
I was reluctant to try the next new vegetable Rick made. He announced proudly one day that he had bought brussels sprouts and had found a recipe to try with them. Nothing about that announcement sounded good to me. But, lo and behold, Rick found a way for me to like brussels sprouts—sautéed in cast iron! A key to this recipe for me is the fresh grated Parmesan cheese. I have always thought that most things taste better with cheese, and I’ve learned that most things taste better when cooked in cast iron. I put one tiny brussels sprout on my plate, knowing how disappointed Rick would be if I didn’t at least try one. It looked like a small cabbage. I closed my eyes and popped it in my mouth. I was pleasantly surprised! Who knew that I would start liking brussels sprouts at the age of 43?
GOLDEN-CRUSTED BRUSSELS SPROUTS
(adapted from the recipe by Heidi Swanson in her book Super Natural Cooking

Cast Iron Required:
10.25” or 12” cast iron skillet with lid
Ingredients
- 24 small brussels sprouts
- 1 tbsp extra-virgin olive oil, plus more for rubbing
- fine grain sea salt
- black pepper, freshly ground
- 1/2 Parmesan cheese, freshly grated
Trim the stem ends of the brussels sprouts and remove any raggedy outer leaves. Cut in half from stem to top and gently rub in olive oil, keeping it intact. Heat the 1 tablespoon olive oil in a 10.25" or 12" cast iron skillet over medium heat. Don't overcook the skillet, or the outsides of the brussels sprouts will cook too quickly. Place the brussels sprouts in the skillet, flat side down, sprinkle with a couple of pinches of salt, cover and cook for about 5 minutes.

The bottoms of the sprouts should only show a hint of browning. Cut into or taste one of the sprouts to gauge whether they're tender throughout. If not, cover and cook for a few more minutes.
Once just tender, uncover, turn up the heat, and cook until the flat sides are deep brown and caramelized. use a metal spatula to toss them once or twice to get some browning on the rounded side. Use a spatula to toss them once or twice to get some browning on the rounded side. Season with more salt, a few grinds of pepper, and a dusting of grated cheese.
Best if served immediately.![]() MacGourmet users, click image to download recipe (or simply drag image to your MacGourmet recipe box).
MacGourmet users, click image to download recipe (or simply drag image to your MacGourmet recipe box).
A coupon book arrived in the mail the next week with a few recipes thrown in, one of which featured zucchini—another green vegetable I had never tried. This time I was going to take the lead and surprise Rick with my new find. The zucchini casserole was easy to make and featured fresh Parmesan. We were out, so I substituted Parmesano Regianno. Mmmm-mmmm, good!
SKILLET ZUCCHINI GRATIN

Cast Iron Required:
10 1/4” Cast Iron Skillet
Ingredients
- 5-6 medium zucchini
- 1/2 cup Parmesan cheese, shredded
- 1 cup panko bread crumbs
- 1 cup heavy cream
- 2 garlic cloves, crushed
- 3-4 sprigs fresh thyme
- olive oil
- salt and pepper, to taste
Heat cream in a small saucepan with garlic and thyme just until it starts to boil. Remove and set aside.
Slice zucchini in 1/8-inch thick rounds.
In a buttered 10.25" cast iron skillet, layer zucchini, salt, pepper, sprinkles of Parmesan cheese, panko bread crumbs, drizzles of heavy cream. Repeat layers until the pan is almost full. Finish the top with bread crumbs, Parmesan cheese and a drizzle of olive oil.
Bake at 350° for 20 to 25 minutes or until golden brown and bubbly.
I think I’m seeing a pattern here: cast iron plus cheese makes vegetables that will please!
For more of Kathy’s vegetable recipes, see her first Veggie Tales post from last year.
Feel free to leave your thoughts in the comments below, or you can contact Kathy directly at kathy@cookingincastiron.com.
Mamme's Chicken & Dressing (modified for cast iron!)
A Yes, I know that the holidays are now behind us, so who wants to talk about dressing? Well, I’m going to post this recipe anyway because it’s something that some of you might want to experiment with during the year before the holidays are upon us again. Frankly, I don’t know why more people don’t use cast iron to make their Thanksgiving or Christmas dressing. Think about that wonderful crust that comes from cornbread in a cast iron skillet. What’s the main ingredient in dressing--cornbread! It’s time to rethink how we make this dish.

I don’t know a whole lot about the history of this recipe, but I find it unusual that it already has chicken in it--similar to something you might find in a cafeteria. My grandmother was a single mother of three children working on a teacher’s salary in Arkansas during the mid-twentieth century, so this may have been a recipe designed to fit with a modest budget. However, this makes it a great dish to take to a potluck this time of year because it is complete in itself. My memories of my grandmother making this particular recipe are starting to fade--she died in 1988--so I was very glad to get a copy of it from a family member. It is still being made annually by my relatives as a way to keep my grandmother’s memory alive.
My grandmother’s name was Maureen Mansfield, but we simply called her “Mamme.” Even though she’s been gone over two decades, I can still remember her voice and the distinct way she would tilt her head upwards and close her eyes when she laughed. The picture of her that I have in this post would probably date from the early 1960s I would guess.
I was very excited to get my grandmother’s recipe, so that I, too, could continue the tradition of making her dressing. But as mentioned earlier, I wanted to try it in cast iron. To me it only seems to make sense that a dressing recipe would be made in cast iron; yet I don’t know anyone who does it. This is probably because most people don’t have cast iron casserole pans (which I highly recommend). I used a Lodge enameled roaster pan
Technically, you can make the gravy for this dressing in any regular pan and transfer it to a gravy boat on the table. However, I used a Lodge 2 qt. serving pot
So you’ve got plenty of time to experiment. Try making this dressing recipe or any other in cast iron in the coming months so you can perfect your method by Thanksgiving. Then, don’t be surprised if you like it cooked in cast iron so much that you don’t ever go back to those old pans again!
Mamme’s Chicken and Dressing
(modified for cast iron)
Cast iron required:
- Cast Iron Skillet
- Any cast iron roaster/casserole pan or try two skillets or one large (9 quarts or larger) dutch oven.
- 6 chicken breasts, chopped into bite-size pieces
- 1.25 quarts broth from cooking chicken, separated
- 2 tbsp butter
- 1 skillet cornbread, (not sweet)
- 10 saltine crackers, crumbled
- 4 celery stalks
- 1 onion
- 4 slices toasted bread, crumbled
- 2 can cream of chicken soup
- 4 eggs, beaten
- black pepper, to taste
- 2 tsp poultry season, (or to taste)
- 2 boiled eggs, chopped
After cooking chicken breasts, debone if necessary, and chop up into bite-size pieces.
Sauté onions and celery in a cast iron skillet.
Mix together crumbled cornbread, sautéed celery and onions, 10 crumbled crackers, 4 crumbled slices of toasted bread.
Add 1 can of cream of mushrooms soup, beaten eggs, black pepper, poultry seasoning, chicken broth, and cooked chicken pieces. Chill overnight.
Set out in the morning and let sit for a couple of hours to get some of the chill off. Pour into a casserole pan (preferably cast iron or a large cast iron dutch oven). Cook at 350° uncovered for approximately 45 minutes or until the center is set and dressing is slightly brown.
To make the gravy, combine 1 can of cream of chicken soup with 1 cup of chicken broth, chopped eggs and 1 to 2 tbsp of cooked dressing. Heat in over a medium heat. I use a Lodge 2 quart serving pot, but a sauce pan works, too. When thoroughly heated, it's ready. If you have the Lodge cast iron pot, serve it in that. Otherwise, pour into your favorite gravy boat.
Feel free to leave your thoughts or ask questions in the comments below, or you can contact Rick directly at rick@cookingincastiron.com.
General Tso's Chicken

These days there's a Chinese restaurant in every strip mall. Most are buffets. Mostly mediocre food. It seems as if there's so much potential, but so very little followthrough in these kinds of places. Really, it's difficult to find even a really good Asian restaurant anymore because of all the competitions of the strip mall variety. I've seen very good Chinese restaurants close their doors because of the cheap Chinese buffet two blocks down cutting into their business.
But there are a few good ones still out there. And I tend to judge any ethnic restaurant of any kind by whether or not I'm the minority nationality when I'm there. If I find that I'm one of the few Westerners in the place, I can generally always expect the food to be not just authentic, but very good as well.
However, as is the case nearly every time I eat out--even at good restaurants--I inevitably think to myself, I could make this taste even better if I made it myself at home.
So shortly after I got my second wok (reviewed last May), I decided I wanted a Chinese cookbook. Well, not exactly a fully authentic mainland Chinese cookbook, but more of the kind that represented the American Chinese cuisine I was used to. Yes, I know, I know, General Tso's Chicken was probably never made in China. But, hey, let me start with what I'm familiar and then I'll later branch out.
In my quest for an American Chinese cookbook, I settled on The Everything Chinese Cookbook
General Tso's Chicken
Cast Iron Required:
- Wok (I used a Lodge cast iron wok
. Any carbon steel wok will work just as well. You could even substitute a Dutch oven, remember what A. D. Livingston
said: "If you've got a Dutch oven, you don't need no damn wok!"
- 1 pound dark chicken meat
- 2 tablespoon soy sauce
- 3 teaspoons Chinese rice wine or dry sherry, divided
- 1/2 teaspoon white pepper
- 1 tablespoon corn starch
- 4 tablespoons dark soy sauce
- 2 tablespoons sugar
- 1/2 teaspoon seasame oil
- 6 dried chiles
- 4-6 cups oil for deep frying
- 1 large clove garlic, minced
- 1 teaspoon minced ginger
- 2 green onions, thinly sliced
Directions
Cut the chicken into cubes. Mix in the soy sauce, 2 teaspoons of the rice wine, white pepper, and the cornstarch, adding the cornstarch last. Marinate the chicken for 30 minutes.
Combined the dark soy sauce, sugar, sesame oil and 1 teaspoon rice wine. Set aside. Cut the red chiles in half and remove the seeds. Chop and set aside.
Heat the oil to 350° F. When the oil is hot, add the chicken cubes and deep-fry until they are lightly browned. Remove from the wok and drain on paper towels.

Raise the temperature of the wok to 400° F. Deep-fry the chicken a second time briefly, until the chicken turns a golden brown. Remove from the wok and drain on paper towels.
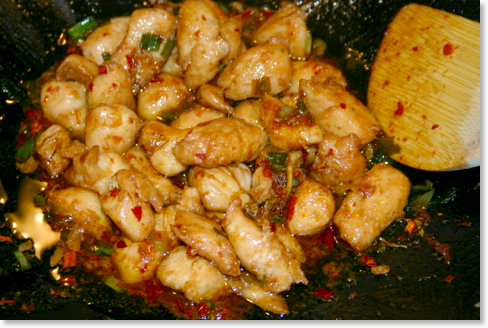
Drain the wok, leaving 2 tablespoons of oil for stir-frying. When the oil is hot, add the garlic, ginger, and green onions. Stir fry briefly until aromatic.

Add the chiles and cook for 1 minute. Add the sauce in the middle of the wok and bring it to a boil. Add the chicken and mix through.

Suggestions for improvement:
- Double the recipe. Kathy and I have been paying close attention to portion size lately. The recipe says that this makes four servings. This is what we were hoping for since we usually like to take leftovers for lunch the next day. This was realistically only two portions--even when trying to keep portions withing a reasonable range. The entire result would equal the average General Tso's ordered from a menu at most Chinese restaurants. I used four cups of oil for the frying. I believe this would be enough even if two pounds of chicken were cooked.
- Use honey instead of sugar. I mean, why not? Honey would give a better, more natural flavor.
- Watch your peppers. The recipe calls for six dried chile peppers. Our dish was very hot, and I was very careful to remove the seeds. Therefore, I'd scale it down to at least four peppers, and maybe even two for mixed company.
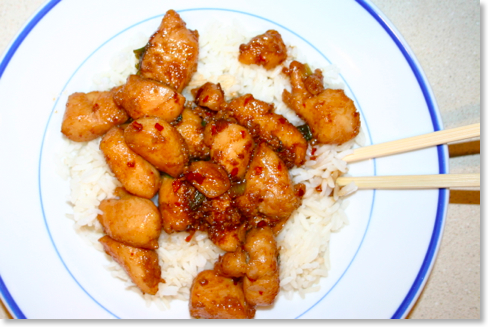
- The dish is a bit salty. Mixing it with a bit of rice helps. Most of the salt comes from the soy sauce, so compare sodium levels if you have access to different kinds of soy sauce.
Feel free to leave your thoughts or ask questions in the comments below, or you can contact Rick directly at rick@cookingincastiron.com.
Macaroni & Cheese in Cast Iron: All You Can Eat

I know I'm biased, but I really do believe that macaroni and cheese tastes better in cast iron. Most folks probably don't think about cooking dishes like this in cast iron, opting for a regular casserole dish or even a non-cast iron stove top pan if making the generic box mix from Kraft. If that's you, I have three suggestions: (1) Regardless of your recipe--whether from scratch or a mix--try it in cast iron. You will be very pleased with the texture that macaroni and cheese gets from cast iron. (2) I've yet to come across a really difficult macaroni and cheese recipes. I strongly urge you to make it from scratch rather than making it from a box. Having said that though, I realize that some folks simply like boxed macaroni and cheese. Therefore (3), if you insist on making macaroni and cheese from a box, at least try it out in cast iron--probably just a skillet--especially if you have a lid for your skillet. You will be very surprised with the results.
To test my assertion that macaroni and cheese always tastes better in cast iron, we made a number of different recipes--four to be exact--all cooked in cast iron. Some of these recipes are better than others. Since Kathy and I cooked them (and ate them!) together, she's going to add her comments. Unless you see Kathy's name next to the paragraph, assume that it's me--Rick--writing.
Supposedly, macaroni and cheese goes back to early 19th century when Thomas Jefferson served it to guests. Whether that's true or not, I don't know. What I do know is that it doesn't begin to popularly appear in cookbooks until the middle of the 20th century. Therefore in an attempt to get back to the foundations of macaroni and cheese, we started with a recipe from the original 1953 Better Homes and Garden New Cook Book
Macaroni and Cheese
1953 Better Homes and Garden New Cook Book

The recipe also calls for 2 cups of American cheese. I can't find American cheese in grocery stores these days; I can only find cheddar. I assume that I could find a block of American cheese at a specialty store, but I simply used cheddar in this recipe instead.
We used a Lodge two-quart serving pot with iron cover
Of the four macaroni and cheese dishes we made, this was the most basic and my least favorite. It's not that it was bad. Not at all. It just simply didn't stand out compared to the other three.
Kathy's comments: Although this macaroni and cheese dish was good (I can't imagine one that isn't!), it was not my favorite. The minced onions just didn't belong. I love onions, but somehow they didn't fit with this recipe. If we made this dish again, I'd try sauteed sweet onions.
Cast Iron Required:
- Two quart cast iron serving pot
- 1 6 oz. package 7-minute macaroni, (or 1 7 oz. package elbow macaroni)
- 2 cups American cheese, cubed
- 1 1/4 cups milk
- 2 tablespoons minced onion
- 1/2 teaspoon salt
- pepper
- paprika
Cook 7-minute macaroni according to directions on package. Mix with cheese, milk, onion, and salt and pepper; turn into creased two quart cast iron pot (original: 1 1/2 quart casserole). Sprinkle with paprika.
Bake mixture in moderate oven [350°] 45 minutes. Makes 6 servings.

Macaroni 'n' Cheese
1953 Better Homes and Garden New Cook Book

I used the same Lodge cast iron serving pot for this recipe as the previous one. I really liked the flavor of this version of macaroni and cheese. The onions and cream of mushroom soup give it a good flavor. It's also the only macaroni and cheese we made that was layered. It looks really nice in the serving pot once it's dipped into, and it looks simply sinful on the plate. I liked this recipe quite a bit and would like to try it again. Kathy did not care for it as much.
Kathy's comments: Of the four macaroni and cheese recipes we tried, this was my least favorite. Once again, I didn't think the onions quite belonged. Since this was the second recipe to have them as an ingredient, I assume I am simply biased against onions in my mac and cheese. I also didn't like the cream of mushroom soup. It turned this side dish into more of a casserole in its taste and feel. Don't get me wrong, I still ate plenty of it, though!
Cast Iron Required:
- Two quart serving pot
- 1 6 oz. package 7-minute macaroni
- 1 10 1/2 or 11 oz. can condensed cream of mushroom soup
- 1/2 cup milk
- 1 teaspoon grated onions
- 1/2 teaspoon salt
- dash pepper
- 1/2 pound American cheese, cubed
Cook macaroni in boiling, salted water; drain and rinse.
Combine the mushroom soup, milk, onion, and seasonings.
Alternate layers of macaroni, soup, and cheese in creased 2 quart cast iron pot (original: 1 1/2-quart baking dish). Bake in moderate oven [350°] about 45 minutes. Makes 6 servings.

Kathy's Jalapeño Macaroni and Cheese
Kathy Mansfield

Kathy's Comments: This recipe is adapted from my Mom’s delicious homemade macaroni and cheese. I live over 700 miles away from Mom, but every time I go home (usually summer and Christmas), she makes sure to have macaroni and cheese ready for me. I don’t often make the dish myself, but when I do I usually add the jalapenos for a little kick! In earlier years I used Jalapeño Cheese Whiz, but I haven’t been able to find it in my local grocery store the past few years. This dish is definitely a crowd pleaser and can even be served as a main pasta dish rather than as a side.
Cast Iron Required:
- Roaster/Casserole pan
- 1 16 oz. box macaroni noodles
- 1 8 oz. Velveeta cheese, cubed (8 oz. jar of Cheez Whiz may be substituted)
- 1-2 fresh jalapeños, chopped fine
- 1/2 stick butter
- 1 cup milk
- 2 cups grated cheddar cheese, in all
- Salt and pepper to taste
- Paprika
Cook macaroni noodles according to package directions. Butter a 9x12 cast iron baking dish. Mix noodles with Velveeta cheese, chopped jalapeños, butter, milk, and one cup of the cheddar cheese. Add salt and pepper to taste. Spread evenly in baking dish. Cover with remaining cheddar cheese. Sprinkle with paprika. Bake at 350 degrees for approximately 20 minutes, or until bubbly.
Macaroni & Cheese Supreme
Cajun Men Cook

In making it this time, we used a cup and a half of white cheddar and a cup of regular yellow cheddar. The original recipe didn't call for it, but I added a little bit of grated yellow cheddar on top for some color. With flour, butter, onions and heavy cream, this makes for one delicious recipe.
I'd also recommend having a little bit of bread handy. This recipe might leave a little bit of butter at the bottom of the bowl. A nice piece of bread can make good use of this!
Kathy's comments: Okay, okay. I know I said I was biased against onions in my mac and cheese, but in THIS recipe they are awesome! I know it's because they are sautéed first. Out of the four recipes, this was my favorite. In the past I haven't been as fond of this particular dish, but this time we used cooking wine rather than regular wine. I always thought in year's past that the wine taste was just a bit strong, but with the cooking wine, the flavor was perfect. I was sad to eat the last spoonful.
Cast Iron Required
- 10 1/4" skillet
- 1 8 oz. elbow macaroni
- 3 tablespoons butter
- 1/4 cup onion, chopped
- 3 tablespoons flour
- 1/2 teaspoon salt
- 1/8 teaspoon black pepper
- 1 cup heavy cream
- 1/2 cup white wine, (or vermouth)
- 2 1/2 cups extra sharp grated cheddar cheese
Directions:
Boil macaroni in boiling salted water according to directions. Drain. Set aside. Meanwhile melt butter, add onion, sauté till tender. Stir in flour, salt and pepper.

Slowly add cream and wine. Cook over low heat, stirring till thickened. Stir cheese until melted.

Add macaroni.

Pour into casserole dish and place in a 350° oven. Should be thoroughly heated and cheese sauce browned and bubbly—about 20 minutes.

What about you? What's your experience with macaroni and cheese in cast iron? Leave your thoughts, and if you want, your favorite recipes in the comments.
Feel free to leave your thoughts or ask questions in the comments below, or you can contact Rick directly at rick@cookingincastiron.com or Kathy at kathy@cookingincastiron.com.
Crawfish Fettuccine in Cast Iron

This coincided with the fact that we still had a pound and a half of crawfish in the freezer from our trip to Louisiana in July. Kathy had been suggesting for a while that we use them in an étouffée, but I wanted to make something with them we'd never made before. I'd been thinking about a crawfish fettuccine which I'd had in restaurants, but had never made myself. However, I'd made other fettuccine dishes before, so I figured it was time to combine the best of both worlds. Kathy and I have a hundred or so cookbooks, so I pulled out about a half dozen different books containing crawfish fettuccine recipes as well as two recipes on the internet and let her decide. I told her she could pick the recipe and I'd make the dish.
Kathy picked the recipe, "Brenda's Crawfish Fettuccine" from the Real Cajun Recipes website. This recipe looked extremely easy to prepare (and it was), and the ingredient list was fairly simple. She had also been skeptical about bell peppers in fettuccine which I thought was fine, but I wanted to make something both of us would eat. This was the only recipe that did not call for them. Plus, most of the crawfish fettuccine recipes I looked at simply had the topping placed over the cooked fettuccine. I liked this one because it baked together in one dish.
However, I noticed one problem right away. The recipe called for 12 oz. of fettuccine, but the average box sold at the grocer is 16 oz. However, I love that the Real Cajun Recipe website has a built in ability to scale recipes. The original recipes said that it would make 6-8 servings, but what I discovered was that as is, it was actually set to six servings. By increasing it to eight servings, the amount of fettuccine increased to 16 oz. However, the rest of the ingredients were at odd measurements such as one and 3/10 onions. So what you see below is my adaptation as to how I made it. All I can tell you is that it was quite good, and Kathy said it was the best meal she'd ever had (however she says things like that all the time!).
CRAWFISH FETTUCCINE
Cast Iron Required:
- 5 qt. Dutch Oven
- 1.5 medium chopped onions, (or 1 and a 1/2)
- 8 tbsp stick butter (1 stick + 3 tbsp)
- 2 chopped celery ribs
- 5 tbsp flour, heaping
- 1.5 lbs. crawfish
- 2 & ¼ cups Half and Half
- 1 8 oz. Velveeta cheese
- 16 ounces fettuccine
- salt, black and red pepper to taste or Cajun seasoning
Sauté onions and celery in butter in the bottom of a 5 quart cast iron Dutch oven.

Add flour gradually, then half and half and cheese heat until the cheese is melted.

Add crawfish and simmer for approximately 25 minutes, stirring constantly so that mixture does not begin to scorch. Season to taste. Cook fettuccine according to package directions, and add the boiled fettuccine into this mixture. Place in the oven and bake for 20 minutes at 350 degrees.

Above: the final product out of the oven. It was bubbling and quite hot.

On the plate with a nice piece of homemade bread.
A handful of notes: I used one medium-sized onion and one small onion. You could just as easily use two medium onions, and I don't believe it would overpower the recipe. Technically, after converting up to the greater number of portions, you would need more than 8 oz. of Velveeta as called for in the original recipe. It's very difficult to find the 8 oz. package these days, and we had purchased the 16 oz size. We'd already used half of that in another recipe a few days earlier, so the 8 oz. was all we had left. I don't feel that this took away from the recipe at all because of all the cream in it as well. Also, we used a pound and a half of crawfish because that's what we had. Contrary to the look of the plate above, there was almost a crawfish in every bite. If you don't want that much, scale it back to a pound.
Finally, the original recipe called for everything to be combined in a 2 quart casserole dish. I can't imagine that this would be large enough. With only slightly increasing the ingredients, we filled a five quart dutch oven with only about an inch and a half to spare as you can see in the pictures. The advantage of using one dutch oven is that everything can be cooked in the same pot (with the exception of boiling the pasta).
Feel free to leave your thoughts or ask questions in the comments below, or you can contact Rick directly at rick@cookingincastiron.com.
Queenie's Cornbread

Most cornbread recipes are fairly easy to make whether using a pre-made mix or making it from scratch. For folks just learning to cook, cornbread is something that can easily build confidence. It's difficult to mess up cornbread unless you burn it! And even overcooked cornbread can still taste good with a little butter or in a bowl of peas or beans as long as it's not too burnt.
While cornbread mixes are okay (I can't knock them too much because they usually taste pretty good), it doesn't take much more effort to prepare cornbread from scratch. I really encourage folks to find a cornbread recipe they like and use that instead of the mixes. And as mentioned a couple of posts back, any baking in the oven, including cornbread, is very "healthy" for your cast iron skillet's seasoning.
This particular recipe belonged to my grandmother on my mother's side, Queenie Pennington. We simply called her "Mammaw." The ingredients are fairly common, and she may have simply adapted a standard recipe over time. I have the advantage of not just having her cornbread recipe, but also having the skillet she used to make cornbread in on nearly a daily basis. I recall many wonderful meals at her house accompanied by her cornbread. When cooked in her pan, there is a particular texture to the outer crust which I cannot duplicate in any other cast iron I've tried. It's not that this particular texture of the crust is superior to other cornbreads; rather, its taste and feel in my mouth so strongly reminds me of my grandmother who died last year at the age of 88. This cornbread doesn't just taste good to me; it also has sentimental value. Every time I cook Mammaw's cornbread, it's like having her back again.
Greg from the "Black Iron Dude" blog recently identified my grandmother's skillet as a product of the Birmingham Stove and Range (BS&R) company. Her skillet is at least 70-years-old and may be older than that.

Above is a picture of my grandmother, Queenie Pennington, and me--probably
taken around 1970. Doesn't she look like someone who would be named Queenie?
Doesn't she look like someone you'd call Mammaw?
And doesn't she look like someone who could just naturally make good cornbread?
My grandmother's recipe below uses a combination of both cornmeal and flour, creating a light and moist cornbread. A basic trick for making any cornbread is to allow your cast iron pan to warm up in the oven while it preheats. I grease the skillet and place it in the oven before I set the temperature. That way it heats up with the oven itself. Then when pouring the batter, the hot iron immediately starts cooking the outer layer making a perfect crust.
If you try this recipe, you'll notice that it creates a very moist batter. Don't worry that's it's too moist. After twenty minutes in a 450° oven, it will be absolutely perfect. Of course some folks like their cornbread a bit more well done, and if that's you, simply keep it in the oven a little while longer.
In the recipe below, note the occasional footnotes. I'll add the notes to the bottom of the post.
QUEENIE'S CORNBREAD
Cast Iron Required:
- 10.25" cast iron skillet1
- 1 1/2 cups white corn meal2
- 1 cup flour
- 1 tsp salt
- 1 tsp baking soda3
- 3 level tsp baking powder
- 2 cups buttermilk
- 1 egg
- 2 tbsp bacon drippings4
Sift dry ingredients into a mixing bowl. Add buttermilk and egg, stirring until combined. Grease skillet with shortening and preheat in 450 oven. Melt drippings and add to batter. Pour batter into very hot skillet and bake at 450 for 20 minutes.

My grandmother's cornbread in the same pan she used for well over six decades.

Notice how nicely the cornbread came out of the pan without sticking. This is testimony to a pan seasoned over decades of use. My mom says that when she was growing up, many times she saw my grandmother flip the cornbread straight from the pan into the air before putting it on a plate. I haven't been brave enough to try this yet.

And finally, the pièce de résistance--my grandmother's cornbread in a bowl of purple hull peas!
I have one more fond memory of my grandmother's cornbread. After we'd finished the wonderful meal she cooked, one or two slices of cornbread always remained. My grandfather would take a slice and submerge it in a glass of ice cold milk. This was essentially his dessert, or his way to cap off a good meal. When I was a boy, I tended to do everything he did when I was around him, so I'd take the other remaining piece of cornbread and ask for a glass of milk myself. I never liked this as much as he did, so I rarely finished the entire glass. But when I was young, a slice of cornbread in a glass of milk seemed like pretty exotic fare.
Notes
1If you prefer cornbread muffins, this recipe yields 12-14 muffins in a standard-sized muffin pan. I haven't experimented yet to see how many cornsticks the recipe will make. I'll determine this and update the post at a later date.
2 My mother wrote down the essential recipe when she was 18 and had just married. In the original draft, as dictated by my grandmother, it specifically says "Aunt Jemima" white cornmeal. We sometimes have difficulty finding this brand, so we often use something different. I haven't discovered any discernible difference in taste or quality.
3 The original recipe as dictated by my grandmother called for "3 pinches; 4 if buttermilk is old" in regard to the baking soda.
4 Kathy and I normally cook with olive oil and don't keep a whole lot of bacon grease around. However, I always use bacon grease for my grandmother's cornbread. I've learned through experience that cooking four slices of bacon yields about one tablespoon of grease. Cooked bacon keeps for a while, so fry up eight or so slices to use in sandwiches throughout the week.
Feel free to leave your thoughts or ask questions in the comments below, or you can contact Rick directly at rick@cookingincastiron.com.
Skillet Banana Cake

Many afternoons were spent down at the Jarrell’s house, playing with Brian (he had more games on his Atari 2600 than I did) or in the small thicket of woods between our houses where he and I built a three-level tree house (It sounds much more elaborate than the actual reality). Another advantage to hanging around the Jarrell house rested in the fact that Sharon Jarrell (pictured above) was a fantastic cook. In fact, she was well known for her cooking, often catering events and publishing her own cookbooks.
Recently, I was going through some recipes that we simply categorize as “family recipes.” When you live next to someone long enough, they count as family. This particular recipe of Sharon’s caught my eye because it specifically called for an “old iron skillet.” I had never made the recipe and couldn’t even remember if I’d ever had it before. Kathy and I have made it twice in the last month or so, and I can only tell you that it is incredible. It tastes wonderful hot out of the oven or cold out of the refrigerator.
Sadly, Sharon Jarrell is no longer physically with us, but she left behind a rich cooking legacy, and I remember her whenever I make any of her recipes such as the one below.
CAST IRON REQUIRED:
- an “old” 10.25” cast iron skillet (if yours is not old, a new cast iron skillet will work just fine).
- a second, smaller skillet (or sauce pan)
CAKE INGREDIENTS
- 1 1/4 cup sugar
- 1 1/2 cup flour
- 1 teaspoon soda
- 4 tablespoons buttermilk
- 2 eggs
- 1 stick butter
- 1/2 teaspoon salt
- 1 teaspoon vanilla
- 1 cup mashed banana

Mix all ingredients together and pour into old iron skillet. Bake at 350º for about 30 minutes.
While the cake is baking, get the topping ready.
TOPPING
- 1 cup pecans - (slightly toasted)
- 5 tablespoons brown sugar
- 3 tablespoons butter
- 3 tablespoons cream or evaporated milk
- 1 teaspoon vanilla

Bring all topping ingredients to a boil.

Pour over cake when it comes out of the oven. Return to oven and broil to bubbling. Watch to keep from burning.

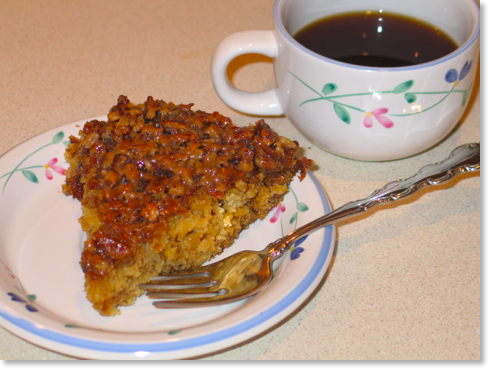
Enjoy!![]() MacGourmet users, click image to download recipe (or simply drag image to your MacGourmet recipe box).
MacGourmet users, click image to download recipe (or simply drag image to your MacGourmet recipe box).
Feel free to leave your thoughts or ask questions in the comments below, or you can contact Rick directly at rick@cookingincastiron.com.
![]()
Cajun Smoked Sausage and Andouille in Brown Gravy

One of the items I buy when in Louisiana is real andouille sausage. I’ll use it in my recipes until I run out. Then I have to use that Yankee brand (Johnsonville) until we can make another run south.
Coming back stocked up on good sausage made me sort through my old copies of Louisiana Cookin’ Magazine for the recipe that is in this post. This particular recipe is adapted from a 19th century dish. I’m pretty sure I have the older one and have made it before, but for the moment, I cannot put my finger on it. I’ve made this recipe or some form of it about three times now. Slow-cooking the sausage in a dutch oven results in very tender meat that falls apart in your mouth. Kathy is not normally much for sausage as a main ingredient; it’s fine for her in something like red beans and rice. But this is a recipe that she really enjoys, as do I.
Often with recipes that use andouille or smoked sausage, a skillet is used in combination with the main pot. One convenient aspect of this recipe is that everything can be prepared in one pot. For this recipe, I used Savoie’s andouille and Down Home medium smoked sausage (if you know of a link for the latter, contact me).
The original recipe said that this made four servings. Okay, I know some people are prone to overeating, but a person would have to have really large bowls to spread this out over only four servings. Eight or more servings is more realistic--even for hearty eaters.
CAST IRON REQUIRED:
- Dutch Oven (Lodge 5 quart pictured here)
INGREDIENTS:
- 1 pound andouille
- 6 cups water, in all
- 1 pound Cajun smoked pork sausage
- 2 tablespoons vegetable oil
- 3 cups cooked long grain white rice
- salt, to taste
- black pepper, to taste
- cayenne pepper, to taste
DIRECTIONS:
Boil the andouille in 3 cups of the water until tender, about 30 minutes. Drain, discard the water and set the andouille aside to cool.
Cut the Cajun smoked pork sausage into bite-sized pieces. Quarter the andouille lengthwise and cut into bite-sized pieces.

Heat the oil in a cast iron pot over a medium high heat. Add the sausage and andouille and sauté until well-browned, about 5 to 7 minutes.

Add one cup of water to deglaze the bottom of the pot, scraping it with a wooden spoon. Add the remaining water and bring to a boil.

Cover, reduce the heat to low, and simmer, stirring occasionally, for 2 1/2 hours.
After two hours, taste and adjust with salt, black pepper and cayenne, if necessary (it wasn’t necessary this time due to the spice already in the sausages).

Serve over white rice.
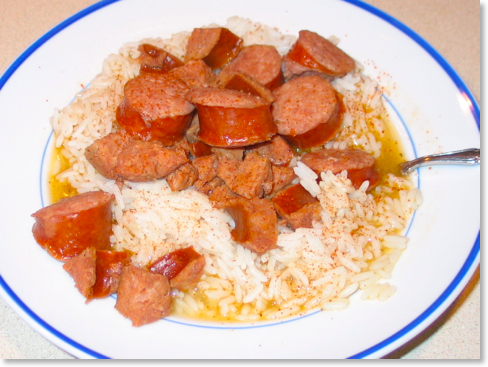
As I mentioned, I’ve made different variations of this recipe before. One of these other methods required slow cooking the dish in the oven instead of on the stovetop. I’ve had results with thicker gravy, although there’s nothing to complain about the outcome shown above. The gravy in this case was more like a broth, but a very rich one made from the juices of the sausages mixed with the water. Adding less water would result in a thicker gravy if desired.
This recipe originally appeared in the February, 2002, issue of Louisiana Cookin’ Magazine.
Feel free to leave your thoughts or ask questions in the comments below, or you can contact Rick directly at rick@cookingincastiron.com.
Review: The Cast Iron Skillet Cookbook (Part 1)
By Sharon Kramis & Julie Kramis Hearne
2004, Sasquatch Books. ISBN 1570614253
Our household is not only filled with cast iron cookware, but also with a variety of cookbooks specifically aimed at aspiring cast iron chefs. This multi-part review will cover my experiments with six of the recipes from The Cast Iron Skillet Cookbook: Recipes for the Best Pan in Your Kitchen. The book was published in 2004 by Sasquatch Books, and it features six categories of recipes: “Breakfast & Brunch,” “Appetizers,” “Entrées,” “Sides,” “Outdoor Cookery,” and “Desserts.”
The authors, a mother/daughter duo, penned a terrific introduction that tells the history of cast iron cooking through four generations of their family, making for interesting reading. A section on how to care for cast iron is an added bonus that will serve cast iron newbies well.
Recipe #1: Monday Night Meatloaf (Entrées, p. 47)
Cast Iron Required:
• 10.25” or 12” skillet

What I liked about the recipe:
- Simple ingredient list
- Very little prep work
- Pork combined with beef
- No bell peppers
What I didn’t like about the recipe:
- No glaze
- Ketchup suggested for dipping
Ingredients:
- 2 tablespoons salted butter
- 1 cup chopped yellow onion (about 1 medium-sized onion)
- 1 cup fresh bread crumbs
- 1 pound extra-lean ground beef
- 1/2 pound ground pork
- 1 can (8 ounces) tomato sauce
- 2 large eggs
- 1 cup grated cheddar cheese
- 1 teaspoon salt
- 1/2 teaspoon freshly ground black pepper
- 2 teaspoons dried Italian herb seasoning
- Ketchup, for serving
Directions:
Position a rack in the center of the oven and preheat to 350°
In a 10- or 12-inch cast iron skillet, melt the butter over medium heat. Stir in the chopped onion and cook for 3 minutes.

Transfer to a large mixing bowl. Place all of the remaining ingredients in the bowl with the onions, and mix together with your hands until well blended.

Form into a football-shaped loaf in the same skillet in which you cooked the onions.

Place the skillet in the oven and bake until the center is no longer pink, about 1 hour. Let cool for 10 minutes.

Pour off the excess fat and juices. Slice and serve hot, with ketchup for dipping [we opted not to use Ketchup, although Rick used Country Bob’s on his second helping].![]() MacGourmet users, click image to download recipe (or simply drag image to your MacGourmet recipe box).
MacGourmet users, click image to download recipe (or simply drag image to your MacGourmet recipe box).
Recipe #2: Horseradish Mashed Potatoes (“Entrées,” p. 51)
This recipe, although listed in the cookbook, is not a featured dish. It is listed as an “accompaniment” to the “Braised Spareribs in Merlot Sauce” (p. 50-51) I plan to make that dish for a later review, but I wanted some sort of mashed potato side for the meatloaf, so I chose to use it this time, too. It does not use cast iron cookware, however.
Ingredients:
- 2 pounds russet or Yukon Gold potatoes, peeled and quartered
- 1/2 teaspoon salt, plus more for seasoning
- 6 tablespoons heavy cream or half-and-half3 tablespoons unsalted butter
- 3 tablespoons mascarpone or sour cream
- 1 tablespoon creamy horseradish
- Freshly ground black pepper
Directions:
Place the potatoes in a large stockpot with the 1/2 teaspoon salt and enough water to cover.
Bring to a rapid boil over high heat. Reduce the heat to medium and cook until soft: drain. Return the potatoes to the pot and cook over medium heat for 3 to 5 minutes, allowing them to absorb some of the moisture. Reduce the heat to low and shake the potatoes over the heat for 3 minutes. Mash with a potato ricer, using medium-wide holes.
In a small saucepan over low heat, mix together the cream, butter, mascarpone, and horseradish. Cook for 5 minutes. Be careful not to let this mixture come to a boil.
Slowly pour the cream mixture into the potatoes while whipping the potatoes with a fork or a whisk. Mix until light and fluffy. Season to taste with salt and pepper and serve hot.
Final Results:
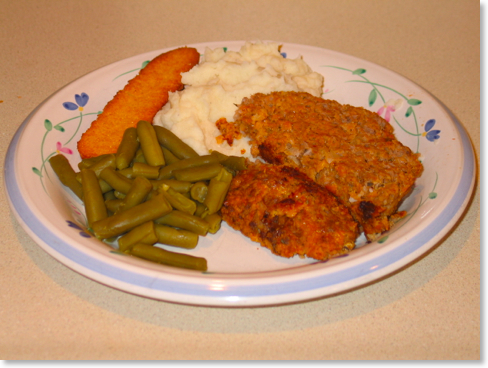
Wow! This meatloaf is definitely a keeper! And, although Rick was wary of the horseradish potatoes, he was pleasantly surprised. I look forward to trying more dishes during the next few weeks. Look for reviews of “Braised Spareribs in Merlot Sauce,” “Slow-Roasted Beef Brisket with Apple Cider-Ginger Barbecue Sauce and Caramelized Sweet Onions,” “Herbed Skillet Bread,” and “Brown Sugar Coffee Cake.” I can’t wait!
You can also follow one of The Cast Iron Skillet’s co-writers, Julie Kramis Hearne on her website, blog and on Twitter.
Feel free to leave your thoughts in the comments below, or you can contact Kathy directly at kathy@cookingincastiron.com.
My Favorite Gumbo

Although I grew up in Louisiana, I never had gumbo until I was about eleven or twelve years old because I was from north Louisiana. Back then the cultures of north and south Louisiana were as different as daylight and dark. When most people outside Louisiana think of the state, they are thinking of south Louisiana. But where I grew up, we probably had more in common with folks from Mississippi, Arkansas, and east Texas.
The cultures of north and south Louisiana are still distinct, but the Cajun and Creole cultures of the south are winning out, especially when it comes to food. It’s nothing today to see signs for crawfish for sale all around north Louisiana and little restaurants with names like “Cajun Cafe.” And who can complain since it’s really good stuff?

This past week while we visited family in Louisiana, it was hot! One day it reached 100° and gumbo was the furthest thing from our mind. Then however it rained the last three or four days we were there. With the cooler temperatures upon us, I grabbed my Lodge 5 quart dutch oven
I’ve made many different gumbo recipes over the years, but this one is my all time favorite. There are all kinds of gumbos, and in spite of the fact that gumbo is an African word for okra, the recipe below does not contain any (although you could easily add it). This is also a Cajun (brown) gumbo as opposed to a Creole (red, tomato-based) gumbo. It is not a seafood gumbo, but rather, is called Chicken Sausage Filé Gumbo. Filé is a powder made from ground sassafras leaves. It is added to a serving of gumbo once it is already in the bowl to thicken it.
This particular recipe comes from a book given to me by my mother-in-law fifteen years ago. It’s called Cajun Men Cook
If you’ve ever come over to my house for gumbo, this is probably the recipe I used. One thing you’ll note if you pick up Cajun Men Cook is that many parts of what you see below is different from what’s in the book. Over the years, I’ve tweaked and adapted the recipe quite a bit.
Chicken Sausage Filé Gumbo
Cast Iron Required
- 7 Quart Dutch
- Cast Iron Skillet
- 1 cup medium brown roux
- 1 three lb. chicken, boiled in 2 1/2 quarts of water and deboned (save stock for gumbo).
- 1 lb. andouille or smoked sausage, cut in 1/2 inch slices
- 2 tablespoons water
- 2 tablespoons oil
- 2 celery ribs, chopped
- 4 cloves garlic, minced
- 2 medium onions, chopped
- 1/4 cup fresh parsley, chopped
- 1/4 cup green onions, minced
- 1 teaspoon Worcestershire sauce
- 3 tablespoons browning sauce
- 2 teaspoons corn starch
- salt and red pepper to taste
- filé powder.
Note: I always make this gumbo in a cast iron. A seven quart Dutch oven is probably the best choice, although it will fit in the five quart, leaving only about one inch of room at the top. If you make a double batch, I recommend a nine quart Dutch oven. The Dutch oven in these pictures is a five quart because that’s all that I had with me at the time.
“First, you make a roux.” This recipe like many Cajun dishes assume that you know how to make a roux already. A roux is really nothing more than flour that’s been allowed to cook so long that it begins to turn brown. Technically, it’s burning, but you want to be careful that it doesn’t burn too much. You’re also going to burn your wooden spoon, so just get over that. I don’t recommend using anything plastic to make a roux, but a silicone spatula would be up to it.

There are numerous methods for making a roux, but what I did for this recipe was to combine 3/4 cup of flour with 3/4 cup Wesson oil to equal roughly one cup of finished roux. Note that I did not measure out an exact cup afterwards. The roux cooked in the pot never left it. Also, if you’re planning for guests and making a roux from scratch add about 45 minutes to an hour to your cooking time. And keep stirring no matter what!
After the roux reaches a nice chocolate brown color, slowly stir in two quarts of broth.
Add vegetables except green onions, parsley, and garlic and bring to a boil for 5 minutes. You may want to use a whisk to blend roux with stock. Stir until everything is well blended, and be careful that the roux does not sink to the bottom of the pot and stick.

In a cast iron skillet, fry andouille sausage with water and oil, allowing water to evaporate before frying begins [skip this step if the sausage is already cooked].

When sausage is light brown put into stock pot. Put chopped up chicken, garlic, and seasonings except pepper. Cover and simmer for one hour.

I tend to come back to the pot and stir the gumbo every 15 minutes or so. The gumbo should be simmering, but not at a full boil. As always, make sure that nothing is sticking at the bottom of the pot.

Add pepper, parsley, green onions, Worcestershire sauce, browning sauce and resalt as needed to adjust taste. Dissolve corn starch in 2 tablespoons of water; stir into gumbo. Simmer 5 minutes and then turn off fire and keep covered. If necessary, skim off excess oil.


Serve over fluffy long grain rice as a soup (I prefer Zatarrain’s Enriched Long Grain Parboiled Rice for any gumbo or étouffée because when prepared correctly, it will not get mushy).
Add filé to each individual serving of gumbo. Do not cook in gumbo as it will make soup stringy.
You’ll have to pardon the fact that the bowls said “seafood gumbo.” They seemed appropriate nonetheless, and our chicken sausage filé gumbo was just as good anyway.

Alternate Method #1: To save time, I have bought rotisserie chickens and use the meat pulled from them. Then you can use two quarts of store-bought chicken stock.
Alternate Method #2: To not only save time, but also for a healthier version of this gumbo, I’ve made it with Tony Chachere’s Instant Roux Mix on a number of occasions. It won’t be as good as a real roux, but it’s still good and a smart option if you’re craving gumbo but watching your weight. If you decide to go this route, stir together one cup of the roux mix and two cups of the chicken stock. Slowly add the mixture to the rest of the stock and vegetables after they have already started boiling. This will require a good bit of stirring with a whisk to make sure the instant roux fully blends with the broth.
Feel free to leave your thoughts or ask questions in the comments below, or you can contact Rick directly at rick@cookingincastiron.com.
Breaking in the New Wok
In his book Cast Iron Cooking: From Johnnycakes to Blackened Redfish, A. D. Livingston famously says, “If you’ve got a dutch oven, you don’t need no damn wok.” And while in essence that’s true--that you can cook just about anything in a dutch oven that you can cook in a wok--it doesn’t mean that a wok isn’t of tremendous value or even that a wok won’t be a better choice for any kind of stir-fry dish.
Kathy and I have been having our own “Asian night” for a while. A few years ago, her brother, Clark, gave me a traditional steel wok. We’ve used it for stir-fry on many occasions, almost always with rice and whatever leftovers were in the refrigerator. Lately, we added a very basic egg drop soup to the menu as well, and at this point I decided I really needed a second wok.
Of course, if I was going to buy a wok myself, knowing that Lodge makes a cast iron wok, I knew this was the one I had to have. In looking at customer comments on Amazon.com and other places, while some folks raved about the Lodge cast iron wok, I also discovered there were wok purists who decried it for being too heavy or that the cast iron was simply not the right kind of metal for stir-fry.
Whatever.
If you’re reading this post, you would probably agree with me that most food is simply better in cast iron! With this assumption in hand, I ordered the Lodge cast iron wok.

My first impression regarding the new wok was how large it was! In the picture above, you see it next to a standard 10 1/4” cast iron skillet. The weight of the cast iron makes for a pan that stays still. I don’t have to hold on to one side of it as I stir.
And as I’ve mentioned before, unfortunately, our current home has an electric range (never again!), but the diameter of the base is small enough that I can actually use the wok--as big as it is--from the smaller burner. As with any wok, by concentrating the heat at the bottom, food that needs less heat can be pushed to the sides.
STIR-FRIED RICE
Cast iron required: cast iron wok
When I make stir-fry, I usually start with sesame oil which I allow to get hot at the bottom of the pan over a medium heat. The sesame oil will give a dish a nice Asian flavor. As I mentioned, we often add whatever is available from leftovers, but if we are including ingredients like uncooked bacon, shrimp, or even raw vegetables like onions (green, white, or yellow) or broccoli, it’s best to add these ingredients first to the oil. I want to always be careful that any meat is fully cooked. Any meat or raw vegetables should be added before the rice which should already be cooked. When adding broccoli, I generally cook it to a bright green, but Kathy often wants it cooked a bit longer.

At this point, I will add in rice that is already cooked. Usually we have leftover rice from another meal, which is often our excuse for stir-fry in the first place. Soy sauce is added to taste. Now the primary purpose is to heat the rice to the same temperature as the rest of the ingredients. The final touch is to add a bit of egg. If raw egg is added to the mixture at this point, it will simply be lost. A better method is to lightly scramble a couple of eggs in another, smaller skillet and right before they are a the point I might serve them as a breakfast item, I take them and add them to the stir-fry, mixing them in without mixing them so fine that they are lost. White pepper and a little more soy sauce or even sesame oil can be added if necessary to taste.

EGG DROP SOUP
Cast iron optional, but a wok (steel or cast iron) is a nice touch
We now use our original steel wok for the egg drop soup. Technically, you don’t need a wok to make egg drop soup, but it certainly seems appropriate to make it in one. The recipe is a very basic one by Rhonda Parkinson which I found a while back on the internet. Although cast iron isn’t really required, I include this recipe here for the sake of completeness. This recipe is basic and easy to make, and to us, it’s as good or better than any egg drop soup we’d get in a restaurant.
Ingredients:
- 4 cups chicken broth or stock
- 2 eggs, lightly beaten
- 1-2 green onions, minced
- 1/4 teaspoon white pepper
- Salt to taste
- A few drops of sesame oil (optional)
Directions:
In a wok or saucepan, bring the 4 cups of chicken broth to a boil. Add the white pepper and salt, and the sesame oil if using. Cook for about another minute.
Very slowly pour in the eggs in a steady stream. To make shreds, stir the egg rapidly in a clockwise direction for one minute. To make thin streams or ribbons, gently stir the eggs in a clockwise direction until they form.

Garnish with green onion and serve.

![]() MacGourmet users, click image to download recipe (or simply drag image to your MacGourmet recipe box).
MacGourmet users, click image to download recipe (or simply drag image to your MacGourmet recipe box).
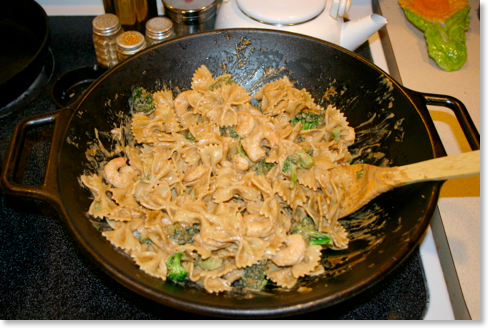
THAILAND PEANUT PESTO (shown here with optional shrimp & broccoli)
Cast Iron Required: Wok
Another recipe we’ve made recently in the wok is Thailand Peanut Pesto which I found on the Tabasco website. This recipe requires one to make a homemade peanut sauce which is just as good as anything I’ve ever had in a restaurant. Kathy generally doesn’t care for peanut-flavored Asian recipes, but she loves this one.
Ingredients:
- 1 cup unsalted roasted peanuts
- 1/3 cup Tabasco brand Soy Sauce
- 1 teaspoon Original Tabasco brand Pepper Sauce
- 1/4 cup honey
- 1/3 cup water
- 3 cloves garlic, minced
- 1/2 cup sesame oil
- 1 pound bowtie pasta, cooked according to package instructions
- 1/2 cup chopped green onions
Directions:
Place peanuts in the bowl of a food processor and process until finely ground. With motor running, add remaining ingredients except pasta and green onions, one at a time, through feeder tube. Process until a thick, smooth paste has formed.
Transfer mixture to a bowl; cover and refrigerate until ready to use. Toss with hot cooked pasta and garnish with green onion.
Makes 4 servings.
Try adding vegetables such as steamed broccoli or snow peas to this, or turn it into an entrée by adding cooked chicken or shrimp.

![]() MacGourmet users, click image to download recipe (or simply drag image to your MacGourmet recipe box).
MacGourmet users, click image to download recipe (or simply drag image to your MacGourmet recipe box).
Ultimately, I’m quite pleased with the cast iron wok from Lodge. It’s heavy so that it doesn’t move on the stovetop while stirring food in it, and everything I’ve cooked in it has been wonderful so far. Whether you are a cast iron aficionado or whether you simply enjoy Asian food, I highly recommend this wok for your cooking enjoyment.
Feel free to leave your thoughts or ask questions in the comments below, or you can contact Rick directly at rick@cookingincastiron.com.
Veggie Tales
Like most kids, I despised vegetables. In fact, I recall living solely on Spaghetti-O’s for a good portion of my growing up years. So, the fact that I will even go near vegetables as an adult is a minor miracle. All this to say, the following cast-iron vegetable dishes must be fairly tasty if I’m willing to put them on my plate. I hope you will enjoy them, too.
Mom’s Squash and Onion Sauté
Mom used to make this dish when I was younger, and I thought it looked absolutely disgusting, so naturally I refused to eat it. At some point in my thirties, I attempted the dish on my own with slight variations (sweetened, caramelized onions, etc.) and found a new favorite. Now Mom actually prefers my recipe!
CAST IRON REQUIRED
• 10 1/4” cast iron skillet
INGREDIENTS
- 4 large yellow squash, peeled and sliced fairly thin
- 1 medium Vidalia onion, sliced
- 1 Tablespoon olive oil
- 1 Tablespoon sugar or artificial sweetener
- Salt to taste
DIRECTIONS
Heat oil in 10 1/4 inch cast iron skillet. Sautee onions until almost caramelized.

Place squash slices on top of onions.

Cover and cook approximately 15 minutes over medium low heat, stirring occasionally to rotate onions to top of pile. Sprinkle sugar (artificial sweeteners such as Splenda work fine, too) after the squash has softened a bit. Add salt to taste. Cook until desired consistency.

(As you can tell from the pictures, I prefer mine cooked down quite a bit). Mmm, mmm, good!
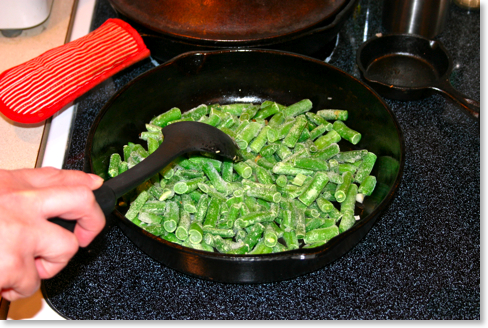
Wendy’s Quick Green Beans w/ Shallots
My good friend Wendy Smith made this vegetable side for a meal while we were visiting in her home. As with the squash above, I’ve adapted the recipe to a more Southern-style “cooked until soggy” consistency rather than the healthier crunch to the vegetables and added good ole Southern-style non-healthy bacon (leave out the bacon for the healthier version).
CAST IRON REQUIRED
• 10 1/4” cast iron skillet
INGREDIENTS
- 1 package frozen green beans (small or medium bag)
- 1 shallot, chopped
- 1 slice bacon, cut into tiny pieces
- 1 Tablespoon olive oil
- 1 Tablespoon sugar or artificial sweetener
- Salt to taste
Heat oil in 10 1/4 inch cast iron skillet for medium bag of beans or 7 inch cast iron skillet for small bag of beans. Sautee chopped shallot and bacon bits until bacon is not quite crisp and shallot is almost opaque.

Add frozen green beans.
Cover and cook over medium low heat until beans are heated through. Sprinkle with sugar (I use Splenda).

Add salt to taste. As with the squash dish above, I tend to cook the beans to a nice, soggy consistency

Feel free to leave your thoughts in the comments below, or you can contact Kathy directly at kathy@cookingincastiron.com.
Seafood & Rice

A Skillet Full is one of my favorite cast iron cookbooks, and I’ll post a full review of the book at a later time. I like the book because it uses an icon system to immediately identify what kind of cast iron cookware is needed in a particular recipe. Perhaps only true cast iron aficionados will truly appreciate this, but sometimes I want to make something in a particular cast iron pan. I can take A Skillet Full and scan the pages for an appropriate recipe for that pan.
This particular recipe reminded me of a cajun étouffée. It uses butter and flour, but they aren’t browned as would be necessary in a traditional roux. Therefore, it’s a bit milder than an étouffée.
I selected this recipe because I was looking for something to cook in a deep fryer besides something simply fried in oil. Technically, this recipe could be prepared in any cast iron skillet of at least 10 1/4” in size. However, the advantage of a deep fryer allowed me to stir the ingredients more briskly without worrying about it going over on the sides of the pan.
I also found it interesting that this recipe is called “Seafood & Rice” when it only calls for shrimp. Why not “Shrimp & Rice”? There are no additional notes about adding anything else, but there’s no reason you could not. The shrimp are good alone, but it might be fun to experiment with crab meat, clams, scallops, crawfish, or any combination of them.
The recipe is extremely easy to make and the final result is quite impressive.
CAST IRON REQUIRED
- deep fryer (chicken fryer)

INGREDIENTS:
- 1/2 cup butter
- 1/4 cup bell pepper, chopped
- 1 large onion, chopped
- 1/4 cup celery, finely chopped
- 2 cloves garlic, minced
- 1 pound shrimp, peeled
- 1 tbsp salt
- 1/2 tsp black pepper
- 1/4 tsp white pepper
- 1/2 tsp onion powder
- 1/2 tsp Tabasco
- 1 1/2 tbsp flour
- 3/4 cup water
- 1/2 cup green onions, chopped
- 1/4 cup fresh parsley, chopped
- hot cooked rice, enough for six
DIRECTIONS:
Put butter in chicken fryer and melt over medium heat. Add onion, celery and bell pepper. Cook 5 minutes, stirring constantly.
Add shrimp, salt, peppers, onion powder, and Tabasco. Cook 5 minutes; then add flour.
Cook 2 more minutes, stirring constantly.
Add water gradually.
Reduce heat to low and cook an additional 20 minutes, stirring occasionally.
Mix in green onions, parsley, and cook for 3 minutes.
Serve over rice.
Source: A Skillet Full
Mildly modified by Rick Mansfield

Onion, bell pepper and celery cooking in butter.

Cooking with shrimp

After the flour has been added.

Adding in the green onions and parsley.

Ready!

Finally, over rice.
Feel free to leave your thoughts or ask questions in the comments below, or you can contact Rick directly at rick@cookingincastiron.com.
What Did You Say You Were Fixin'? (How to Cook Fried Okra)
CAST IRON REQUIRED
- Cast Iron Skillet
One of my family’s favorite side dishes is fried okra. This underestimated vegetable of African origins is definitely a southern staple. Unfortunately, the most common method of serving okra is with a heavy breading. While it can still be tasty, the potential of the okra is wasted inside such doughy coatings. Cooking okra at home produces far more satisfying results than ordering it at the restaurant, but you’ll need a few simple pointers to fry okra up exactly right. (Incidentally, okra can add wonderful flavor to soups and can make an excellent combination with stewed tomatoes, but we’ll focus on fried okra today.)
Finding fresh okra is your first step. Typically, okra is in season year round in the south and from May through October in other areas. If, however, you are unable to get your hands on any fresh okra, pick up a bag of fresh frozen okra in the frozen food section of your local grocery.
Next, you will need cornmeal and oil. Typically, I use yellow cornmeal because I like the grainy texture. However, other forms of cornmeal will fry up nicely. I generally use vegetable oil, but canola oil will serve the purpose as well.
Once you’ve assembled your ingredients, you can begin. The amount of cornmeal you need will depend on how much okra you are cooking. You will need enough cornmeal in a bowl to coat the okra. If you have found fresh okra, you’ll want to make sure it is free of dirt. I recommend wiping the okra off carefully with a paper towel or an old towel. Running okra under water tends to make it slimy. Cutting the okra will also be a little slimy, so if you have allergies, you may want to wear gloves while cutting it. When the okra is clean, cut the ends off of the pieces and then slice the okra into small pieces of approximately 1/4 inch each. As you cut the okra, drop the pieces into the cornmeal. (If you are using precut, frozen okra, simply drop it into the cornmeal.) Run your fingers through the cornmeal and mix the okra into the meal until the okra is coated.
Pour enough oil into your skillet to cover the bottom. Heat the oil on medium-high heat. Heating the oil will take approximately 5 minutes. After a few minutes, test the oil by sprinkling a dash of water over the oil. If it pops or sizzles, you’ll know the oil is ready for the okra. Turn your heat down to medium. Using a long-handled spoon, carefully drop the breaded okra into the pan in a single layer. Do not “stack” the okra. Allow the okra to cook approximately 5-10 minutes (if it was fresh, longer if it was frozen) before stirring for the first time. Stir the okra slowly and periodically until it fries to a nice golden color. Once the okra is done, drop it onto a place covered by a couple of paper towels (to absorb excess oil). Salt and pepper the okra liberally. Continue cooking if you have more okra. You may have to add oil to the pan as you finish your okra. You may also need to scoop out the breading that has fallen in the pan as it can burn while you are cooking a second round of okra.

If you are not completely satisfied with your first effort at frying okra, please don’t give up! The most common mistakes when frying okra typically come from having your heat up too high or cooking the okra too long. You want to remove it from the heat when it has just become crunchy.
While okra makes an excellent side dish to most any meat, my favorite pairings are with grilled chicken, pork chops, or barbecued ribs. If you happen to be a vegetarian, you might especially enjoy fried okra with corn on the cob and stewed tomatoes.
Feel free to leave your thoughts in the comments below, or you can contact Leila directly at leila@cookingincastiron.com.
Crawfish Étouffée (Lite)

If I had to pick my favorite Louisiana dish, it might just be étouffée. Like gumbo, étouffée can be made with crawfish, shrimp, crab or chicken. My favorite is crawfish which I believe have much more flavor than shrimp, but I once even tried a ground meat étoufée, which I found to be a bit unusual. Like many Louisiana dishes, étouffée is served over rice. I usually don’t put andouille or smoked sausage in mine, but I’ve seen others include it. I don’t know if I’ve ever actually tried an étouffée I didn’t like, although some are definitely better than others.
This past week I discovered a new kind of étouffé when I visited a local Cajun restaurant, J. Gumbo’s and tried their vegetarian chili cheese étouffée. I always taste before I add Tabasco, but in my sample taste of this new kind, I didn’t get one of the jalapeño peppers the dish, so after I doctored it up with the hot sauce, it was EXTRA hot!
Yesterday, I reviewed MacGourmet Deluxe (see post here). However, I’ve been using the software, a recipe database program (and so much more), since early July learning the ends and outs of it. For the week of July 4, we visited friends and family in Louisiana and had a shrimp boil on the holiday. Afterwards we had a good bit of shrimp leftover, and I suggested we use some of it for an étouffée.
Wanting to try out my newly acquired copy of MacGourmet Deluxe, I looked for an étouffée recipe. When I had installed the software, it asked if I wanted to include some sample recipes, some of which were from the website, Real Cajun Recipes, including the étouffée recipe seen below.
Now, there are two distinctions in the étouffée recipe below. First, to make it lite/diet, it forms its base from canned soup instead of a traditional roux. This is not wholly unusual, and I’ve found a couple of really good étouffée recipes that use cream of mushroom soup before, but if you’ve never had the dish, realize that what is below is not necessarily standard fare. I also feel the need to point that this is a Creole dish, not a Cajun one. At the most elementary level, what makes this Creole is the inclusion of tomatoes. My favorite étouffée dishes are the ones without tomatoes, but this one is good nonetheless (for a dozen different recipes for étouffée from Real Cajun Recipes, go here). This recipe also calls for 4 tablespoons of ketchup, which although I found to be unusual, included for the sake of trying the recipe as close as possible to its original directions.
Below is my mildly adapted version of the original. The accompanying pictures in this post show shrimp, rather than crawfish.
CAST IRON REQUIRED
- Dutch oven (4 or 5 quart recommended)

(above: sautéing the onions, bell pepper, and celery)
INGREDIENTS
- 1 pound crawfish tails or shrimp
- 1 onion chopped
- 1 bell pepper chopped
- 2 stalks celery (chopped fine)
- 2 tbsp butter or canola oil
- 1 can cream of mushroom soup (reduced calorie)
- 1 can cream of celery soup (reduced calorie)
- 1 can Rotel tomatoes original or spicy
- 2 cans water
- ½ cup parsley
- ½ cup green onions (onion tops)
- 4 tbsp catsup (large dollop)
- 1 pod of garlic (optional)
- black pepper - to taste
DIRECTIONS
In smaller Dutch oven over medium heat, sauté onion, bell pepper, celery and garlic (optional) until onions have wilted. Add the Rotel tomatoes and stir until tomatoes are heated.
Add the cans of cream of mushroom and cream of celery. Stir and then add enough water to dilute the mixture to form a thick gravy. Remember, your crawfish or shrimp will give off water in the final steps of the cooking. Lower the heat and cook until mixture is heated, stirring as needed to prevent scorching. Add black pepper if desired. Note that the soup provides enough salt for this dish. Easy on the salt if you do decide to use it.
Rinse the crawfish in a colander to remove the crawfish fat that they were packed in. Drain well. Add crawfish to the mixture along with the parsley and green onions. Cook no more than 10 minutes. In the last couple of minutes of cooking, add a large dollop of catsup mainly for coloring but does give a nice taste to your dish. Serve over rice.

Feel free to leave your thoughts or ask questions in the comments below, or you can contact Rick directly at rick@cookingincastiron.com.
JT's Family Tradition Pancake Recipe

CAST IRON REQUIRED:
- Griddle or skillet
- Melting Pot
INGREDIENTS
- 1 cup unbleached flour
- 2 tsp baking soda
- pinch of salt
- 3/4 cup milk
- 1 Tbs sunflower oil
- 1 Tbs honey
- 1 egg, brown of course
- 1/2 tsp vanilla, or 1/4 tsp almond extract
DIRECTIONS
Combine dry ingredients. In a separate bowl, combine milk, oil, honey, egg and vanilla (or Almond).
(Hint 1: measure the oil first, then the honey in the same measuring spoon. The honey slips right out yielding the entire tablespoon with no sticking).
(Hint 2: warm the milk in the microwave for 45 seconds. The honey will dissolve more readily, and the pancakes will cook more evenly because the batter isn’t cold)
Mix the liquids into the dry with a spoon or wisk, it’s okay to leave a few small lumps of batter rather than over mix.
Pour the batter (1/4 to 1/2 cup amounts depending on desired size) onto an oiled, cast iron griddle or skillet. I use low heat, because the cast iron conducts efficiently, and I don’t want the cooking process to begin until I have finished the pour. When bubbles start to rise to the top, check the bottom surface and flip when the right amount of golden brown is apparent. Serve right off the griddle and top with real maple syrup from the melting/warming pot.
Variation:
Immediately after pouring the batter, drop chocolate chips or blueberries on top and tap in with the spatula. This works much better than trying to mix them into the batter bowl, and it gives you the option to arrange them in fun designs.
Rule:
Never, which means not ever, use a pancake mix. This isn’t complicated. You can do it, and you and your kids will appreciate it.
Feel free to leave your thoughts in the comments below, or you can contact JT directily at ironman@cookingincastiron.com.